How to Set Up Your First Feedback Request and Send It with FeedbackRobot
Introduction
Getting your first feedback request live shouldn’t feel like rocket science. With FeedbackRobot, you can set up your first feedback request and send your first feedback survey in just a handful of clicks. No coding, no guesswork.
In this guide, we’ll walk through:
- Choosing the right feedback channel
- Selecting or customizing your survey template
- Defining and segmenting your audience
- Scheduling and personalizing your send
- Reviewing, previewing, and launching your survey
Along the way, you’ll see the exact screens, tips for higher response rates, and how to tap our Embed Survey feature for on-page feedback.
Ready to collect your first wave of actionable insights? Let’s dive in!
Choose Your Feedback Channel
Before anything else, decide where you want to reach your customers.
- Email - Best for in-depth questions (NPS, CSAT), sent post-purchase or after support tickets.
-
SMS/WhatsApp - Ideal for quick-start or yes/no questions. Super high open rates.
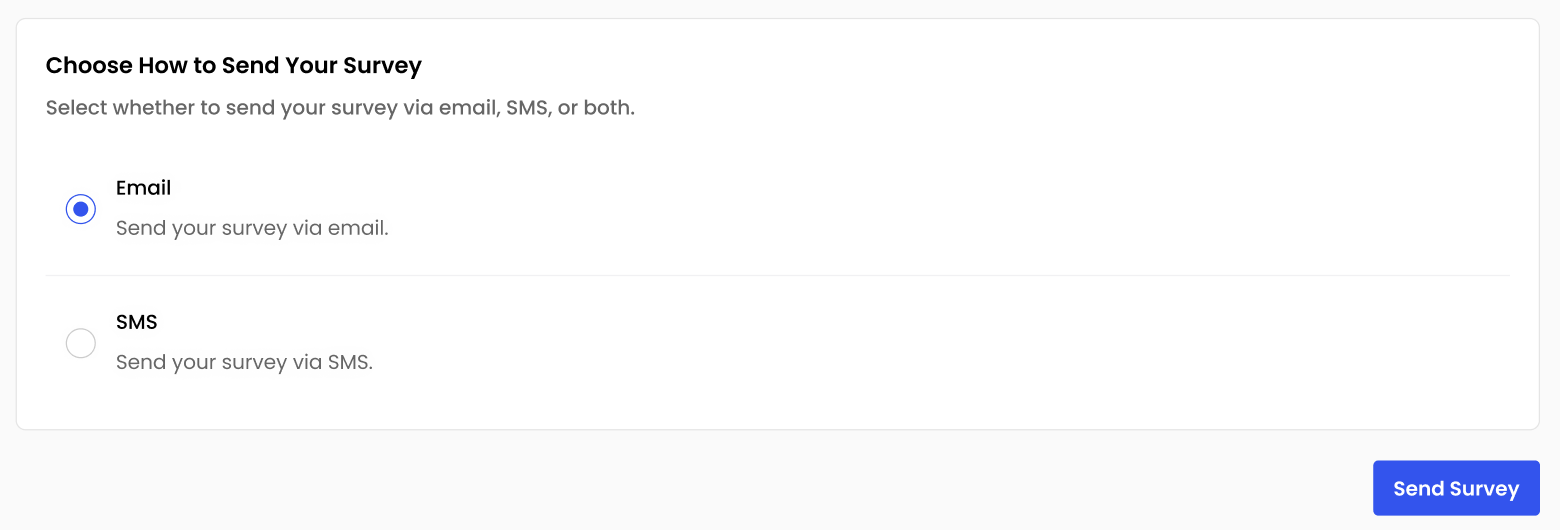
Choose how to send your survey

Select or Customize Your Survey Template
Picking the right template gets you up and running instantly
- Click Send Survey and choose Browse Surveys.
- Scan our pre-built templates, NPS, CSAT, CES, and more.
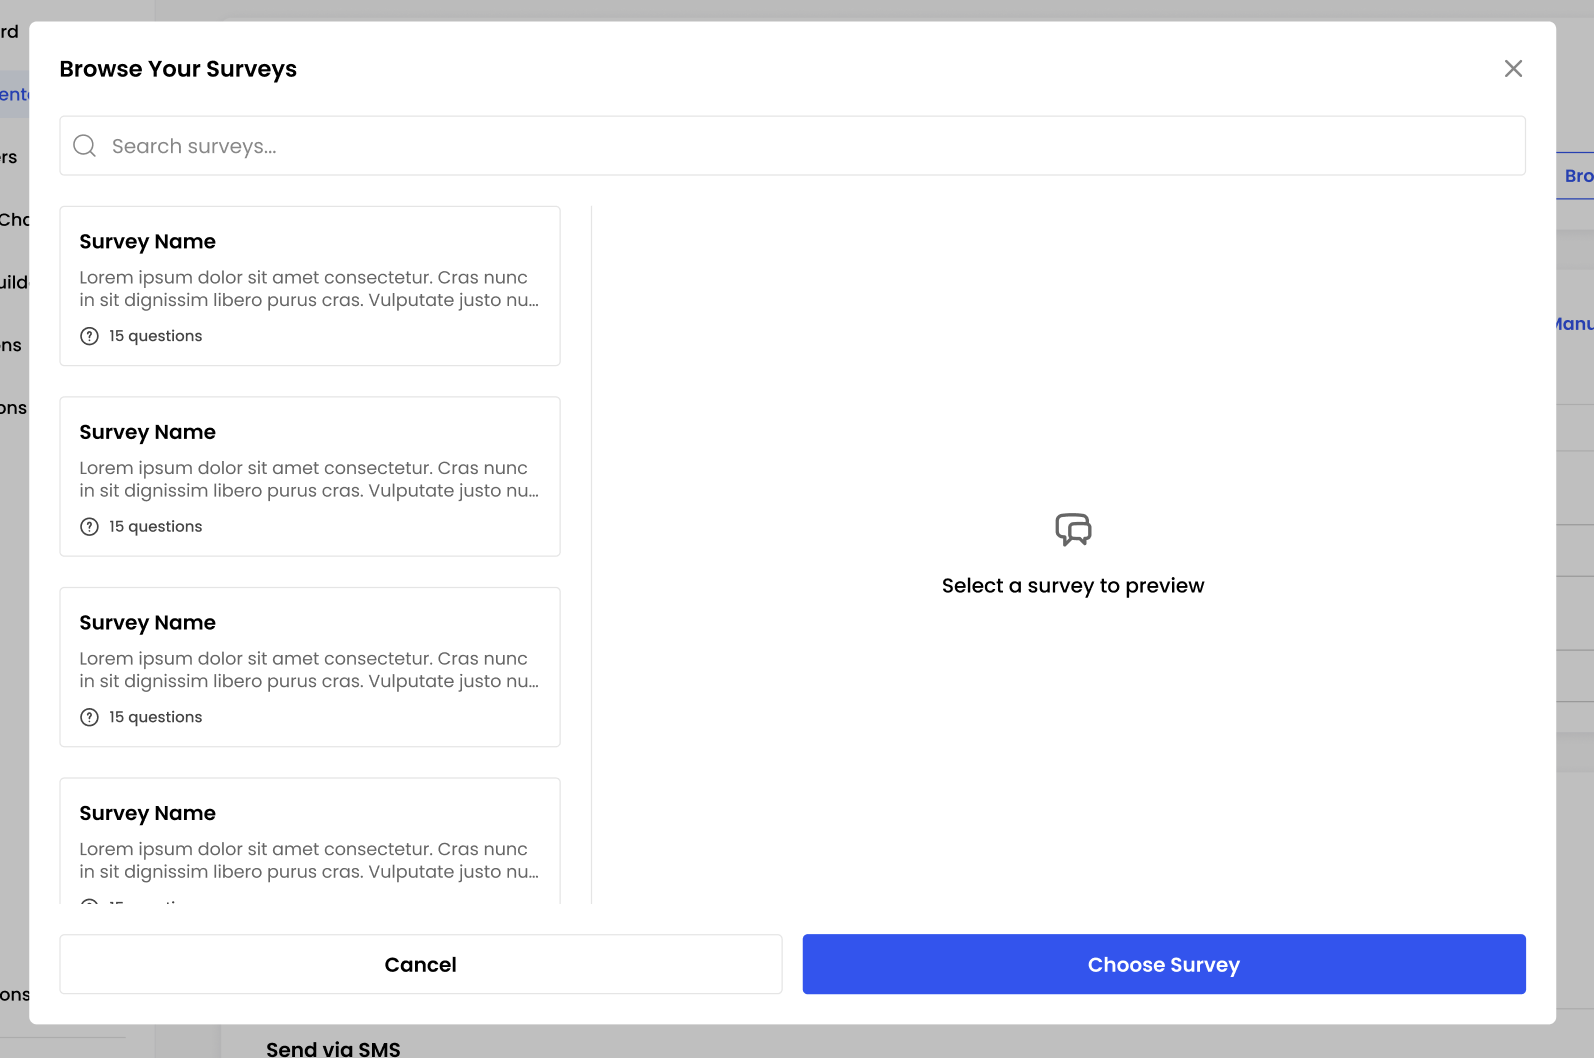
- Preview questions and branding
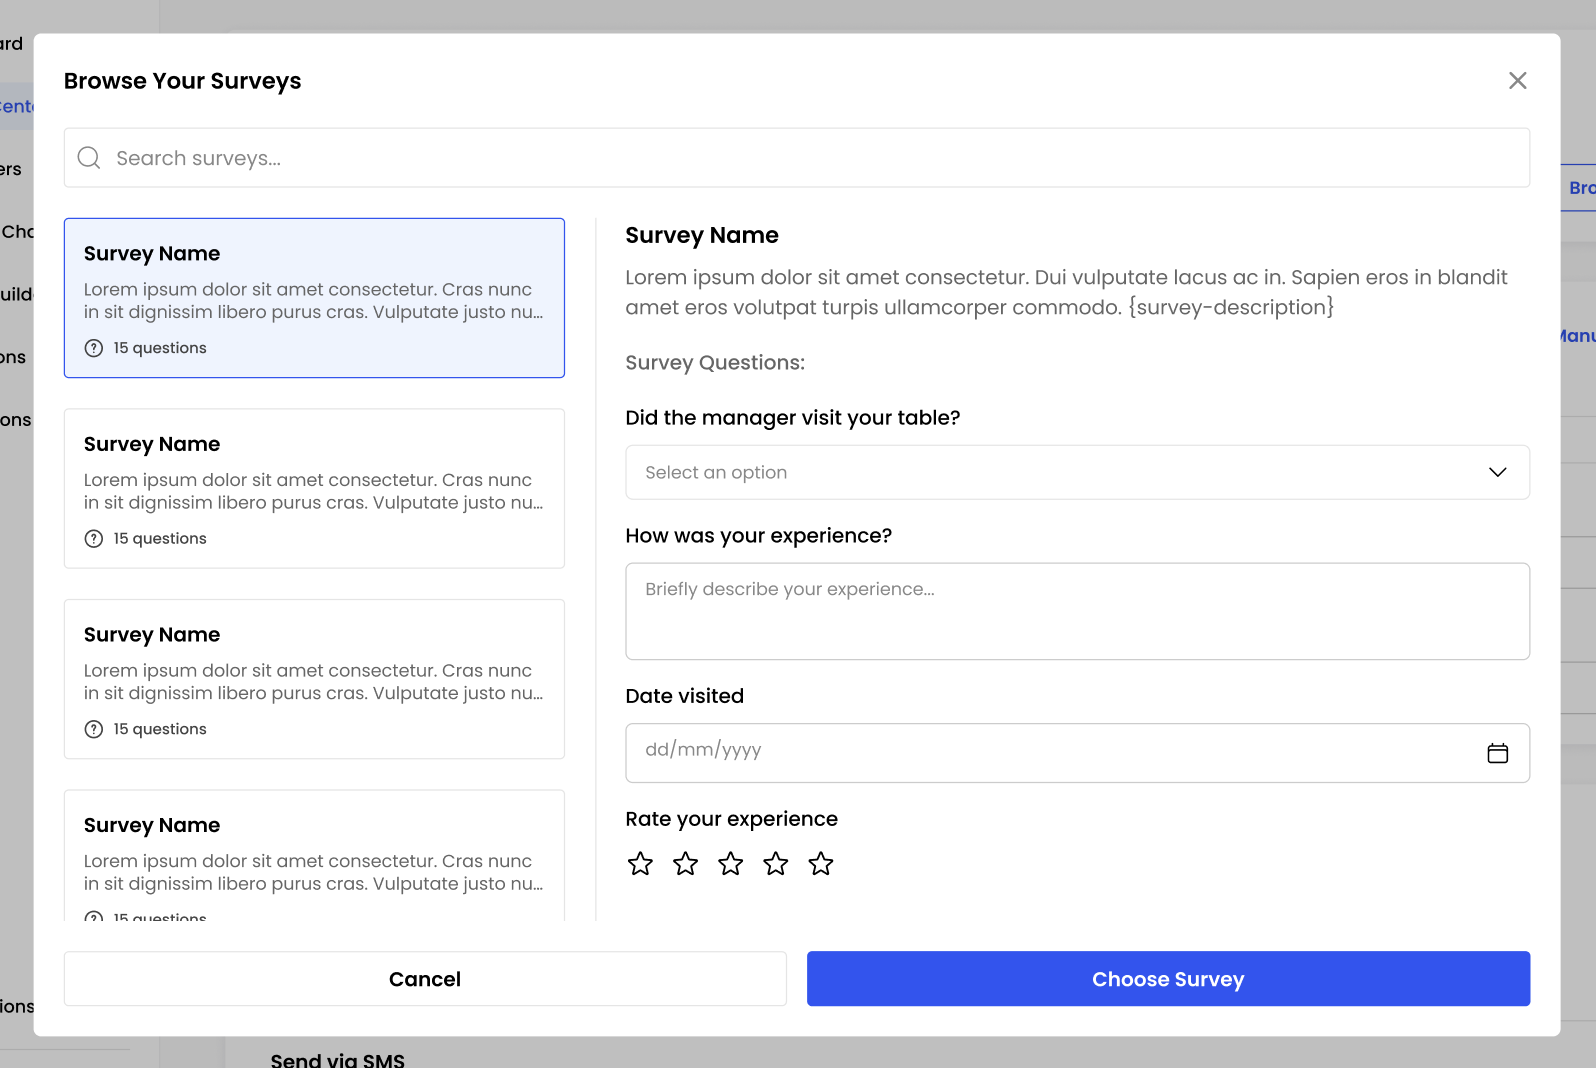
- Tweak as needed, edit question text, add your logo, swap colors, or enable branching logic for personalized flows.
Define Your Audience: Import or Segment Customers
Who you ask matters just as much as what you ask:
- Upload a CSV of email addresses or phone numbers.
- Connect your CRM (Shopify, etc.) for live-sync segments.
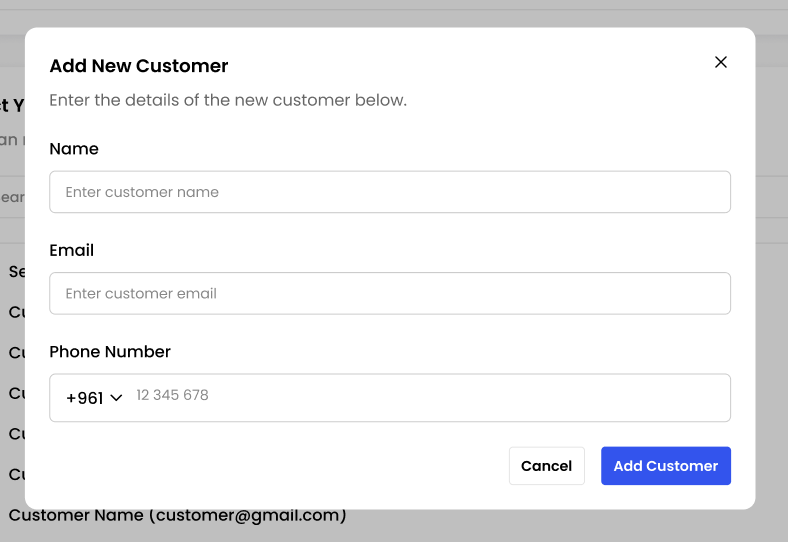
Use filters: purchase date, region and repeat buyers to target the customers whose feedback you need most.
Review, Preview and Hit Send
One last check before go-time
- Preview Mode - See exactly how your email, SMS, or embedded survey looks on desktop and mobile.
- Final Checklist - Confirm channel, template and customers list.
When everything checks out, click Send Survey (or Save and Activate for automated flows). Congratulations! You’ve just sent your first feedback survey!
Automations: Trigger Surveys Automatically
Keep feedback flowing without lifting a finger by setting up Automations in the Survey Center.
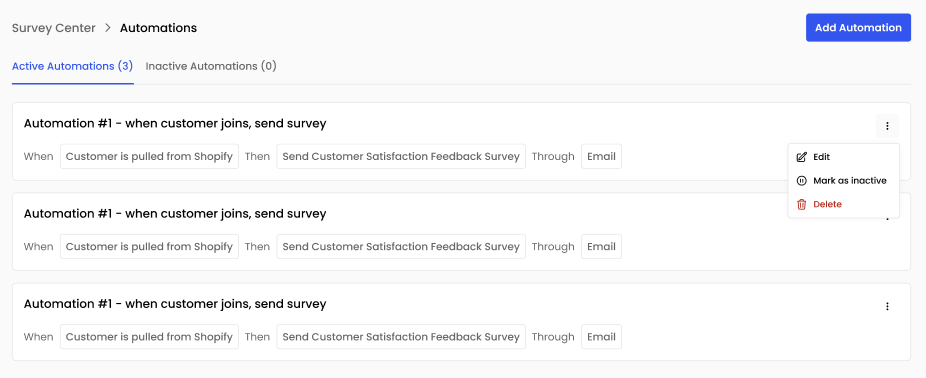
How to use Automations:
- Click Add Automation.
- Choose a trigger (e.g., new customer in Shopify, support ticket closed).
- Select the survey to send and the channel (Email, SMS).
- Save and activate. The system will now send surveys automatically whenever your trigger fires.
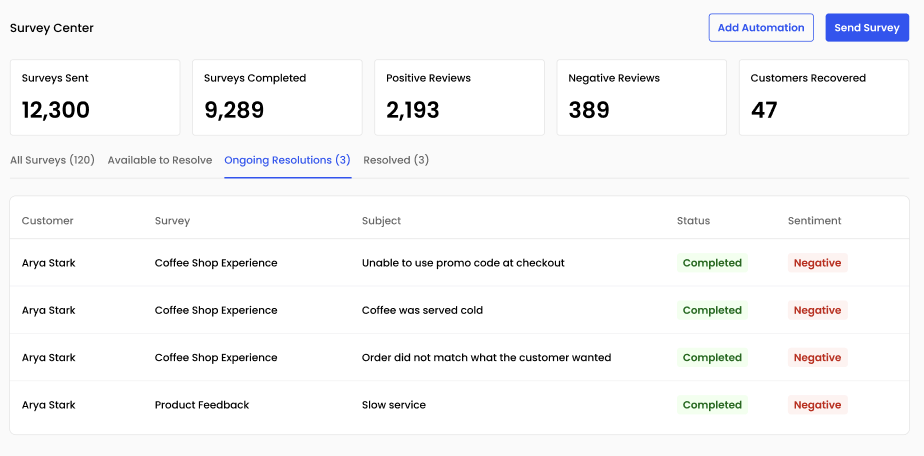
Review Individual Survey Responses
Whenever a customer completes your survey, you can jump into a detailed response view that summarizes sentiment and shows their exact feedback.
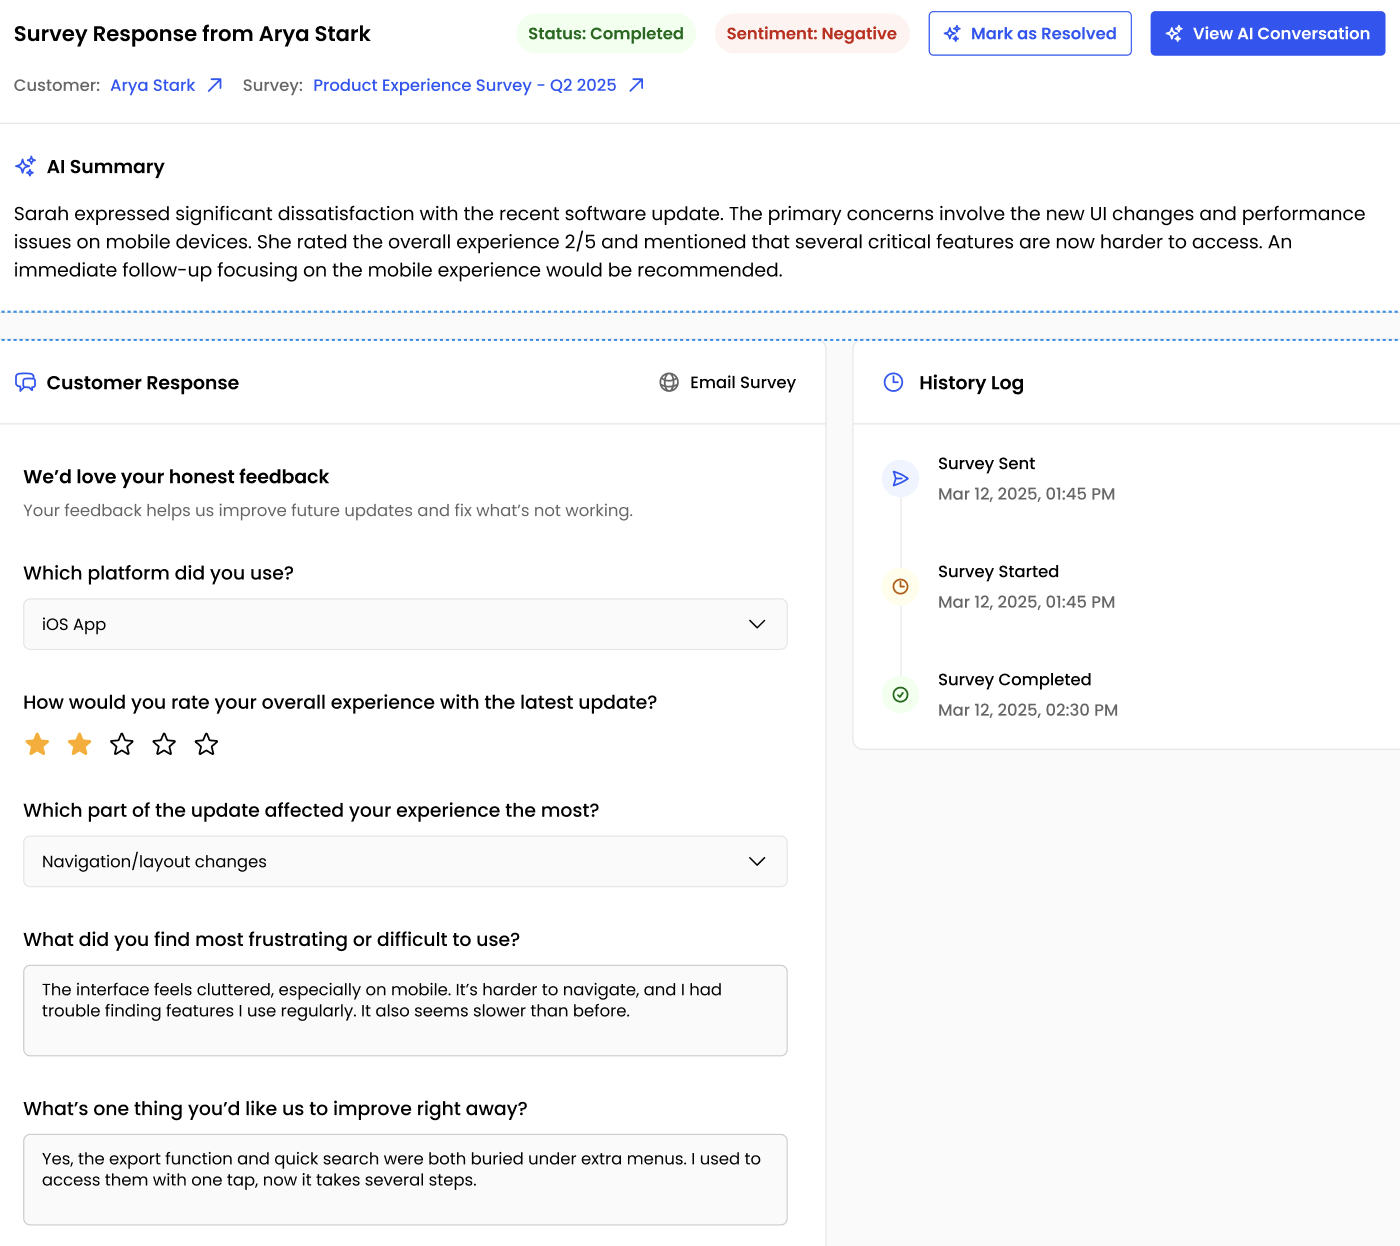
Key features of the response view
- AI Summary - Instant one-paragraph recap of sentiment and main pain points.
- Customer Response - Full survey answers, with star ratings and open-ended comments.
- History Log - Timeline of when the survey was sent, started, and completed.
Engage with Customers via the Resolution Thread
Turn unhappy customers into advocates by using the built-in Resolution Thread.
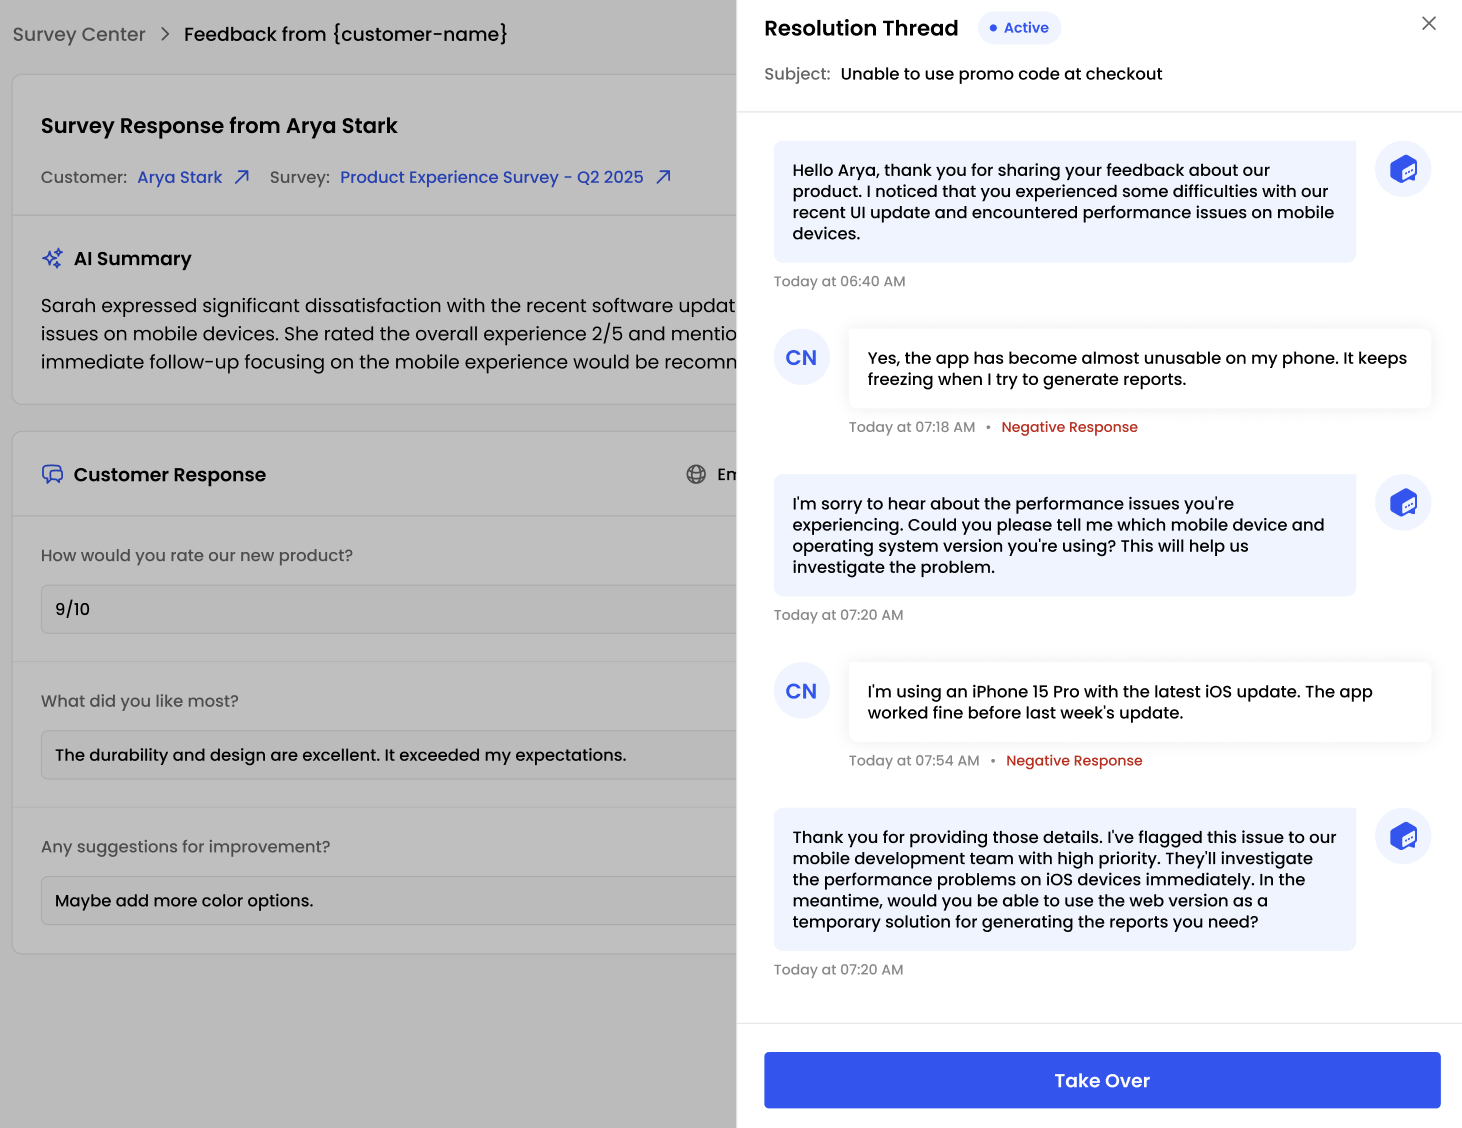
How the Resolution Thread works
- Click Initiate Resolution on a negative response.
- The customer replies right in the thread. No switching to email or phone is needed.
- Hit Take Over to continue the conversation manually or mark the issue as resolved.
Wrapping Up
By automating survey sends, reviewing each response in depth, and engaging directly via the Resolution Thread, you’ll build a feedback engine that scales with your business. Keep experimenting with channels, templates, and triggers and watch your customer insights grow richer every day!
Happy surveying! 😉